Mod: Lithium Batteries
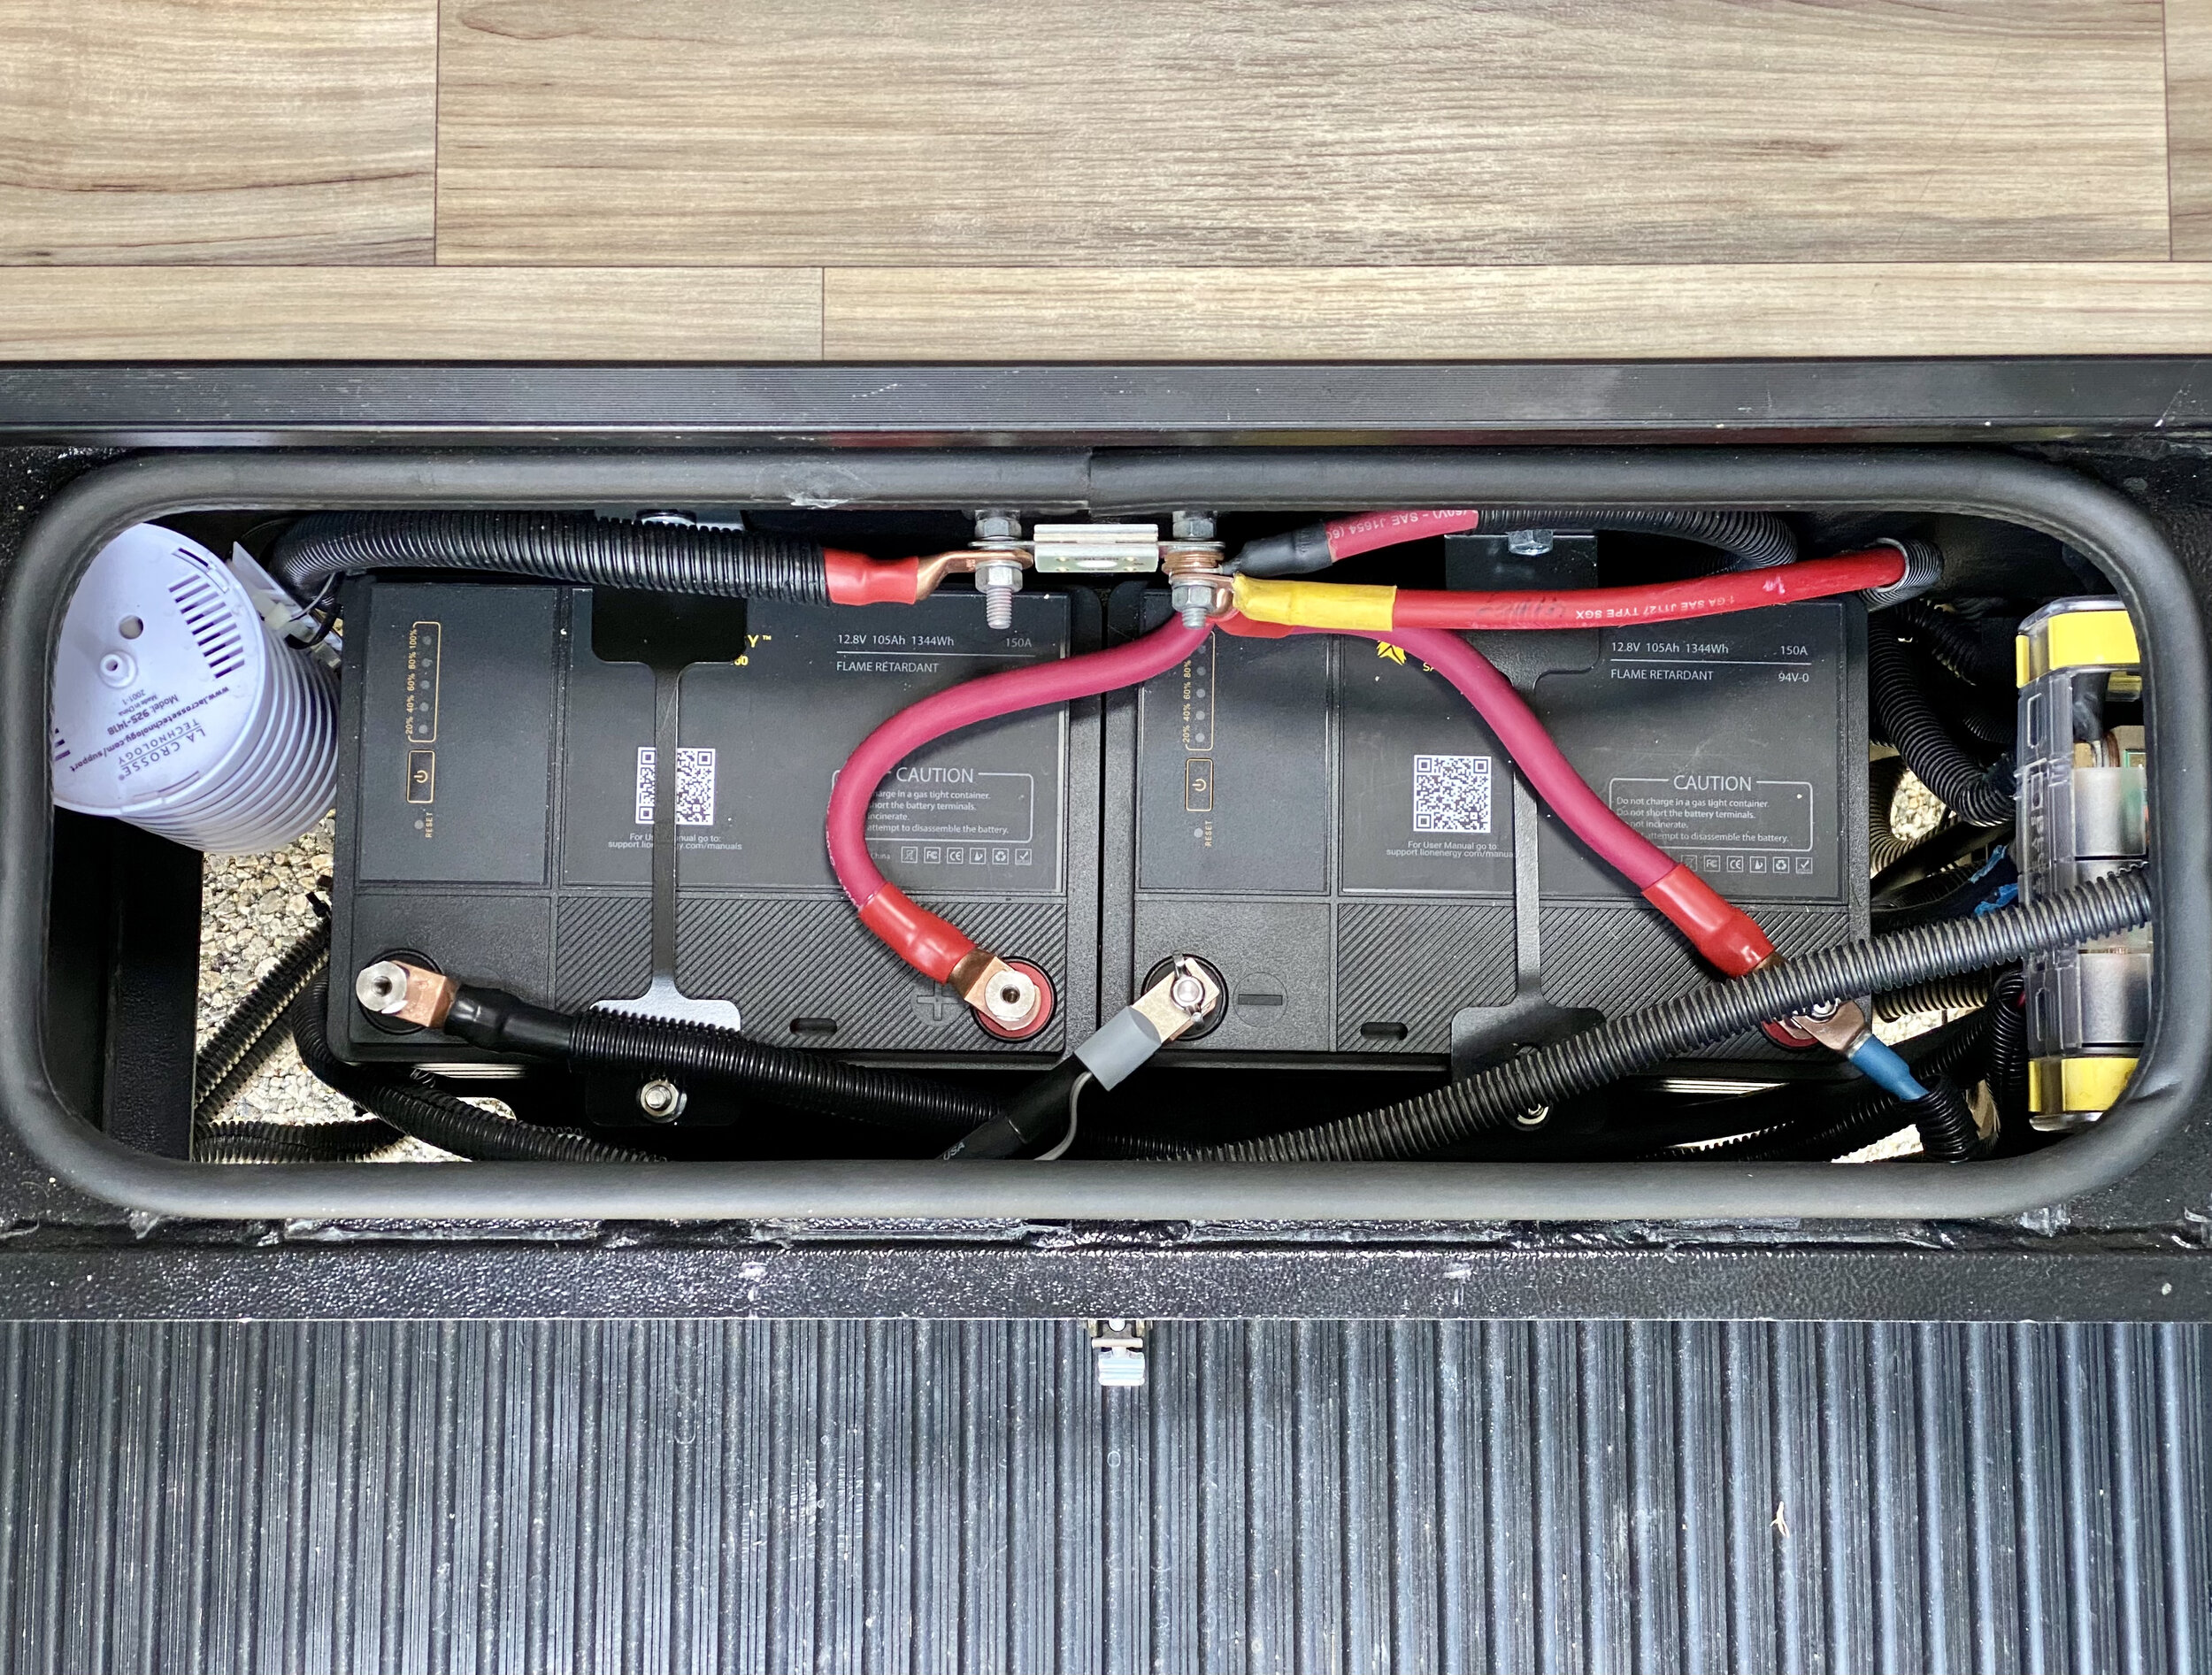
Battery compartment under the steps with two Lion Energy Safari UT 1300 Lithium batteries.

Battery compartment under the steps with two Lion Energy Safari UT 1300 Lithium batteries.

Battery compartment under the steps with two Lion Energy Safari UT 1300 Lithium batteries.

Victron 30 amp Non-Isolated DC/DC Charger being installed under passenger seat base.

Looking straight down into passenger seat base with passenger seat removed. From this perspective, the passenger door is to the left of the photo, and the driver’s seat is to the right.
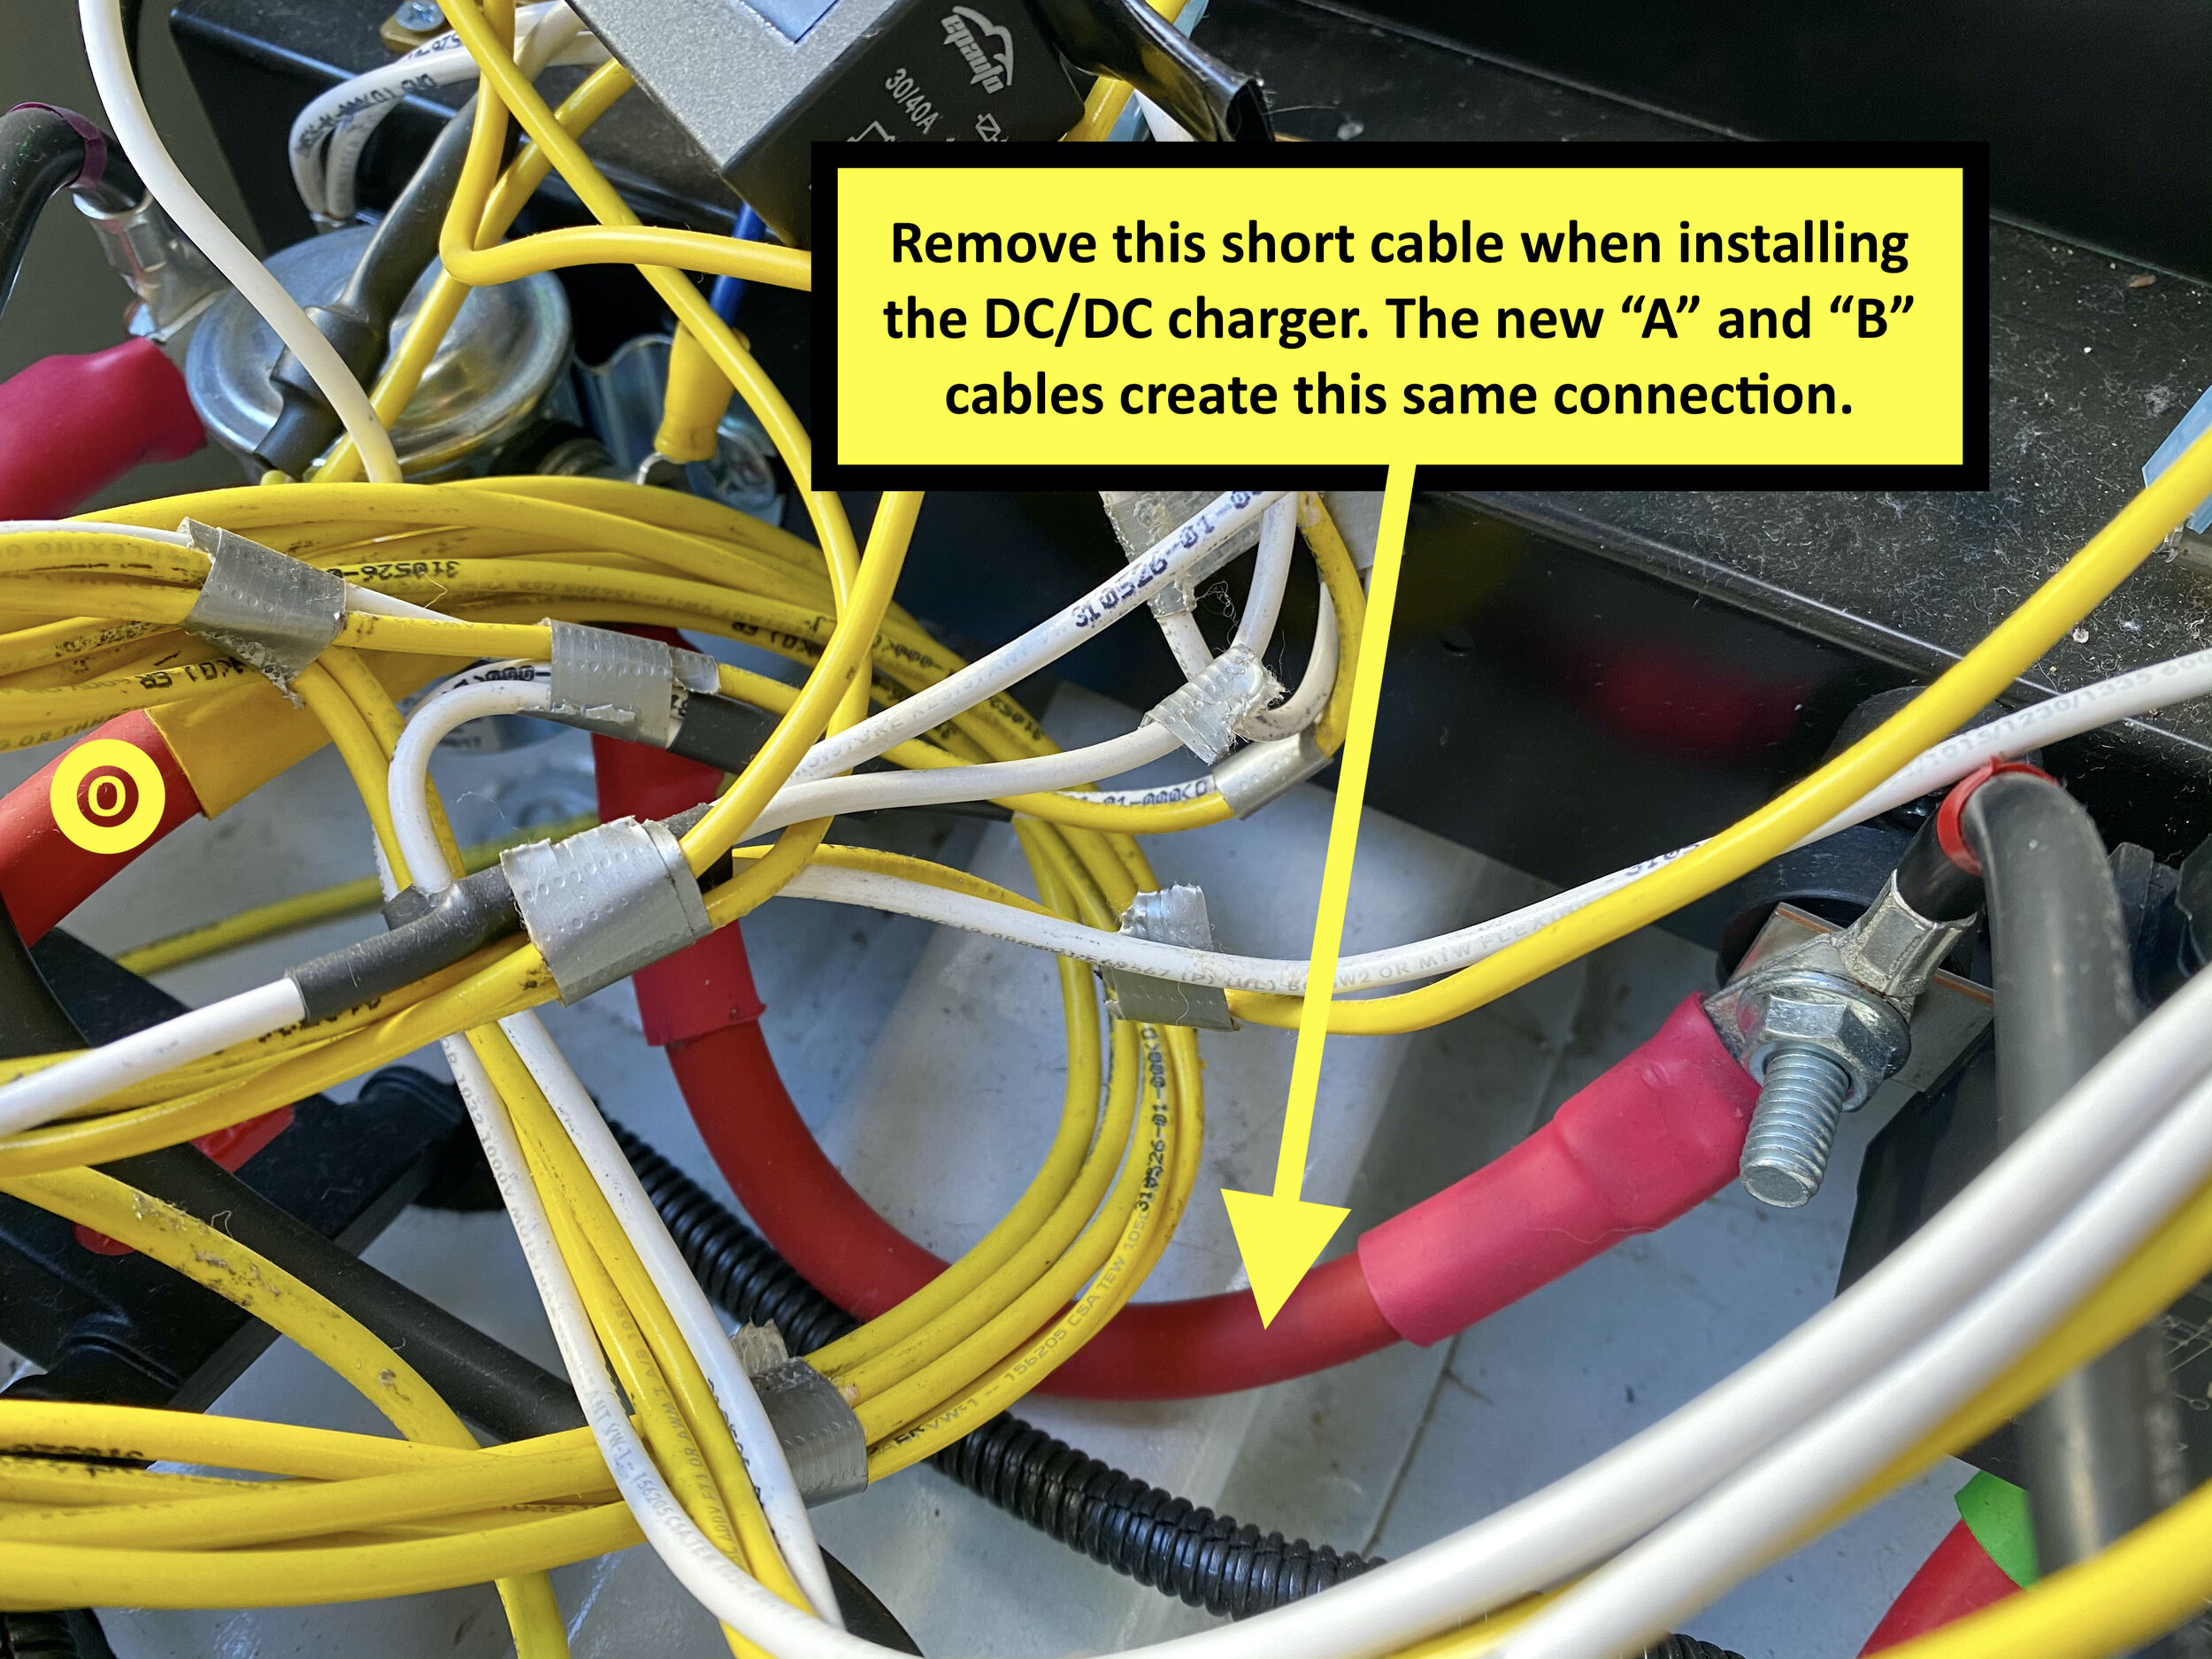
This area is under the passenger seat base with passenger seat removed. Only remove this cable if you’re installing the DC/DC charger.

Amp-L-Start installation under the passenger seat base with passenger seat removed.
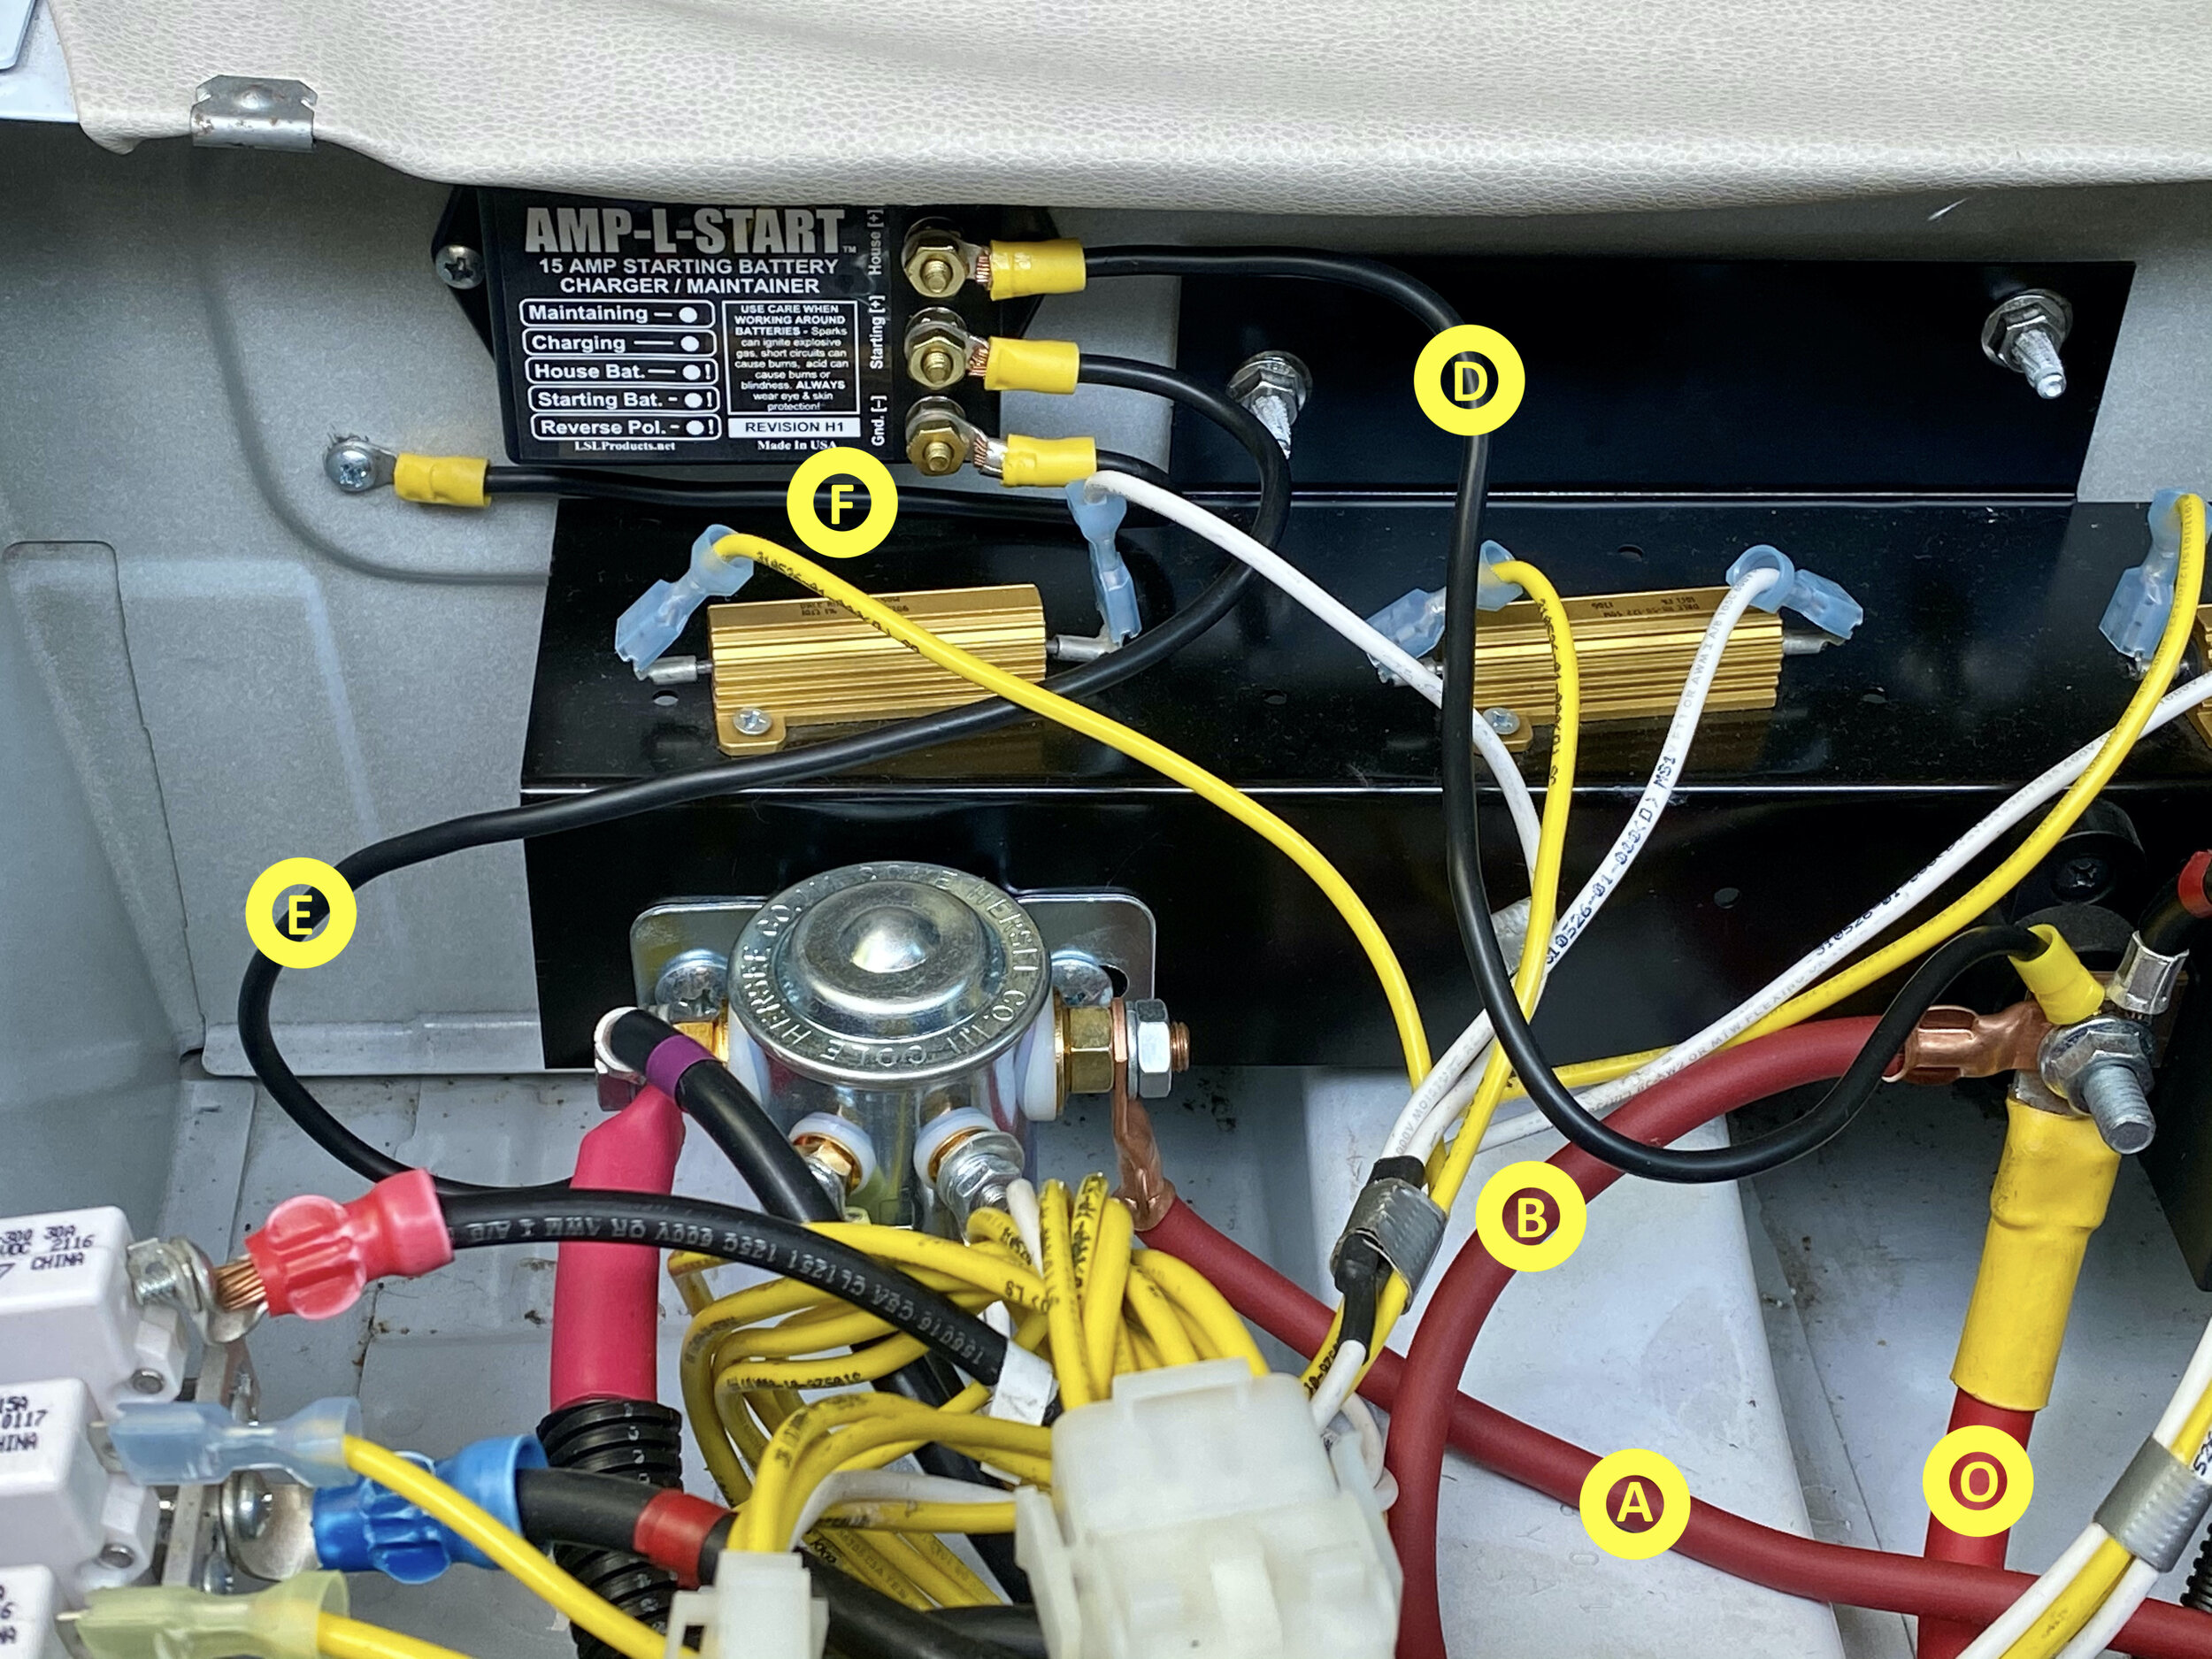
Amp-L-Start and boost solenoid under the passenger seat base with passenger seat removed.

Boost solenoid under the passenger seat base with passenger seat removed.

Boost solenoid under the passenger seat base with passenger seat removed.

Boost solenoid under the passenger seat base with passenger seat removed.

Coach battery disconnect relay under the passenger seat base with passenger seat removed.

Bolt under the passenger seat base with passenger seat removed.

Bolt removed under the passenger seat base with passenger seat removed.

Victron Non-Isolated DC/DC charger installed under the passenger seat base with passenger seat removed.

Victron Non-Isolated DC/DC charger installed under the passenger seat base with passenger seat removed. I used 1” spacers to separate the heatsink on the back of the charger from the metal seat base.

Front of passenger seat base.

Victron Non-Isolated DC/DC charger installed under the passenger seat base with passenger seat removed. I cut out a section of foam to let the heat dissipate more easily.

Exterior compartment on passenger side, just behind the steps. Xantrex Freedom XC Pro Inverter/Charger is mounted to ceiling of compartment.

Exterior compartment on passenger side, just behind the steps. Xantrex Freedom XC Pro Inverter/Charger is mounted to ceiling of compartment.

This is the floor of the coach, underneath the galley drawers.

These are the electrical hookups on the rear of the Xantrex Freedom XC Pro Inverter/Charger. “G” and “H” connect to the battery; “I” and “J” connect to the 120vac coach wiring.
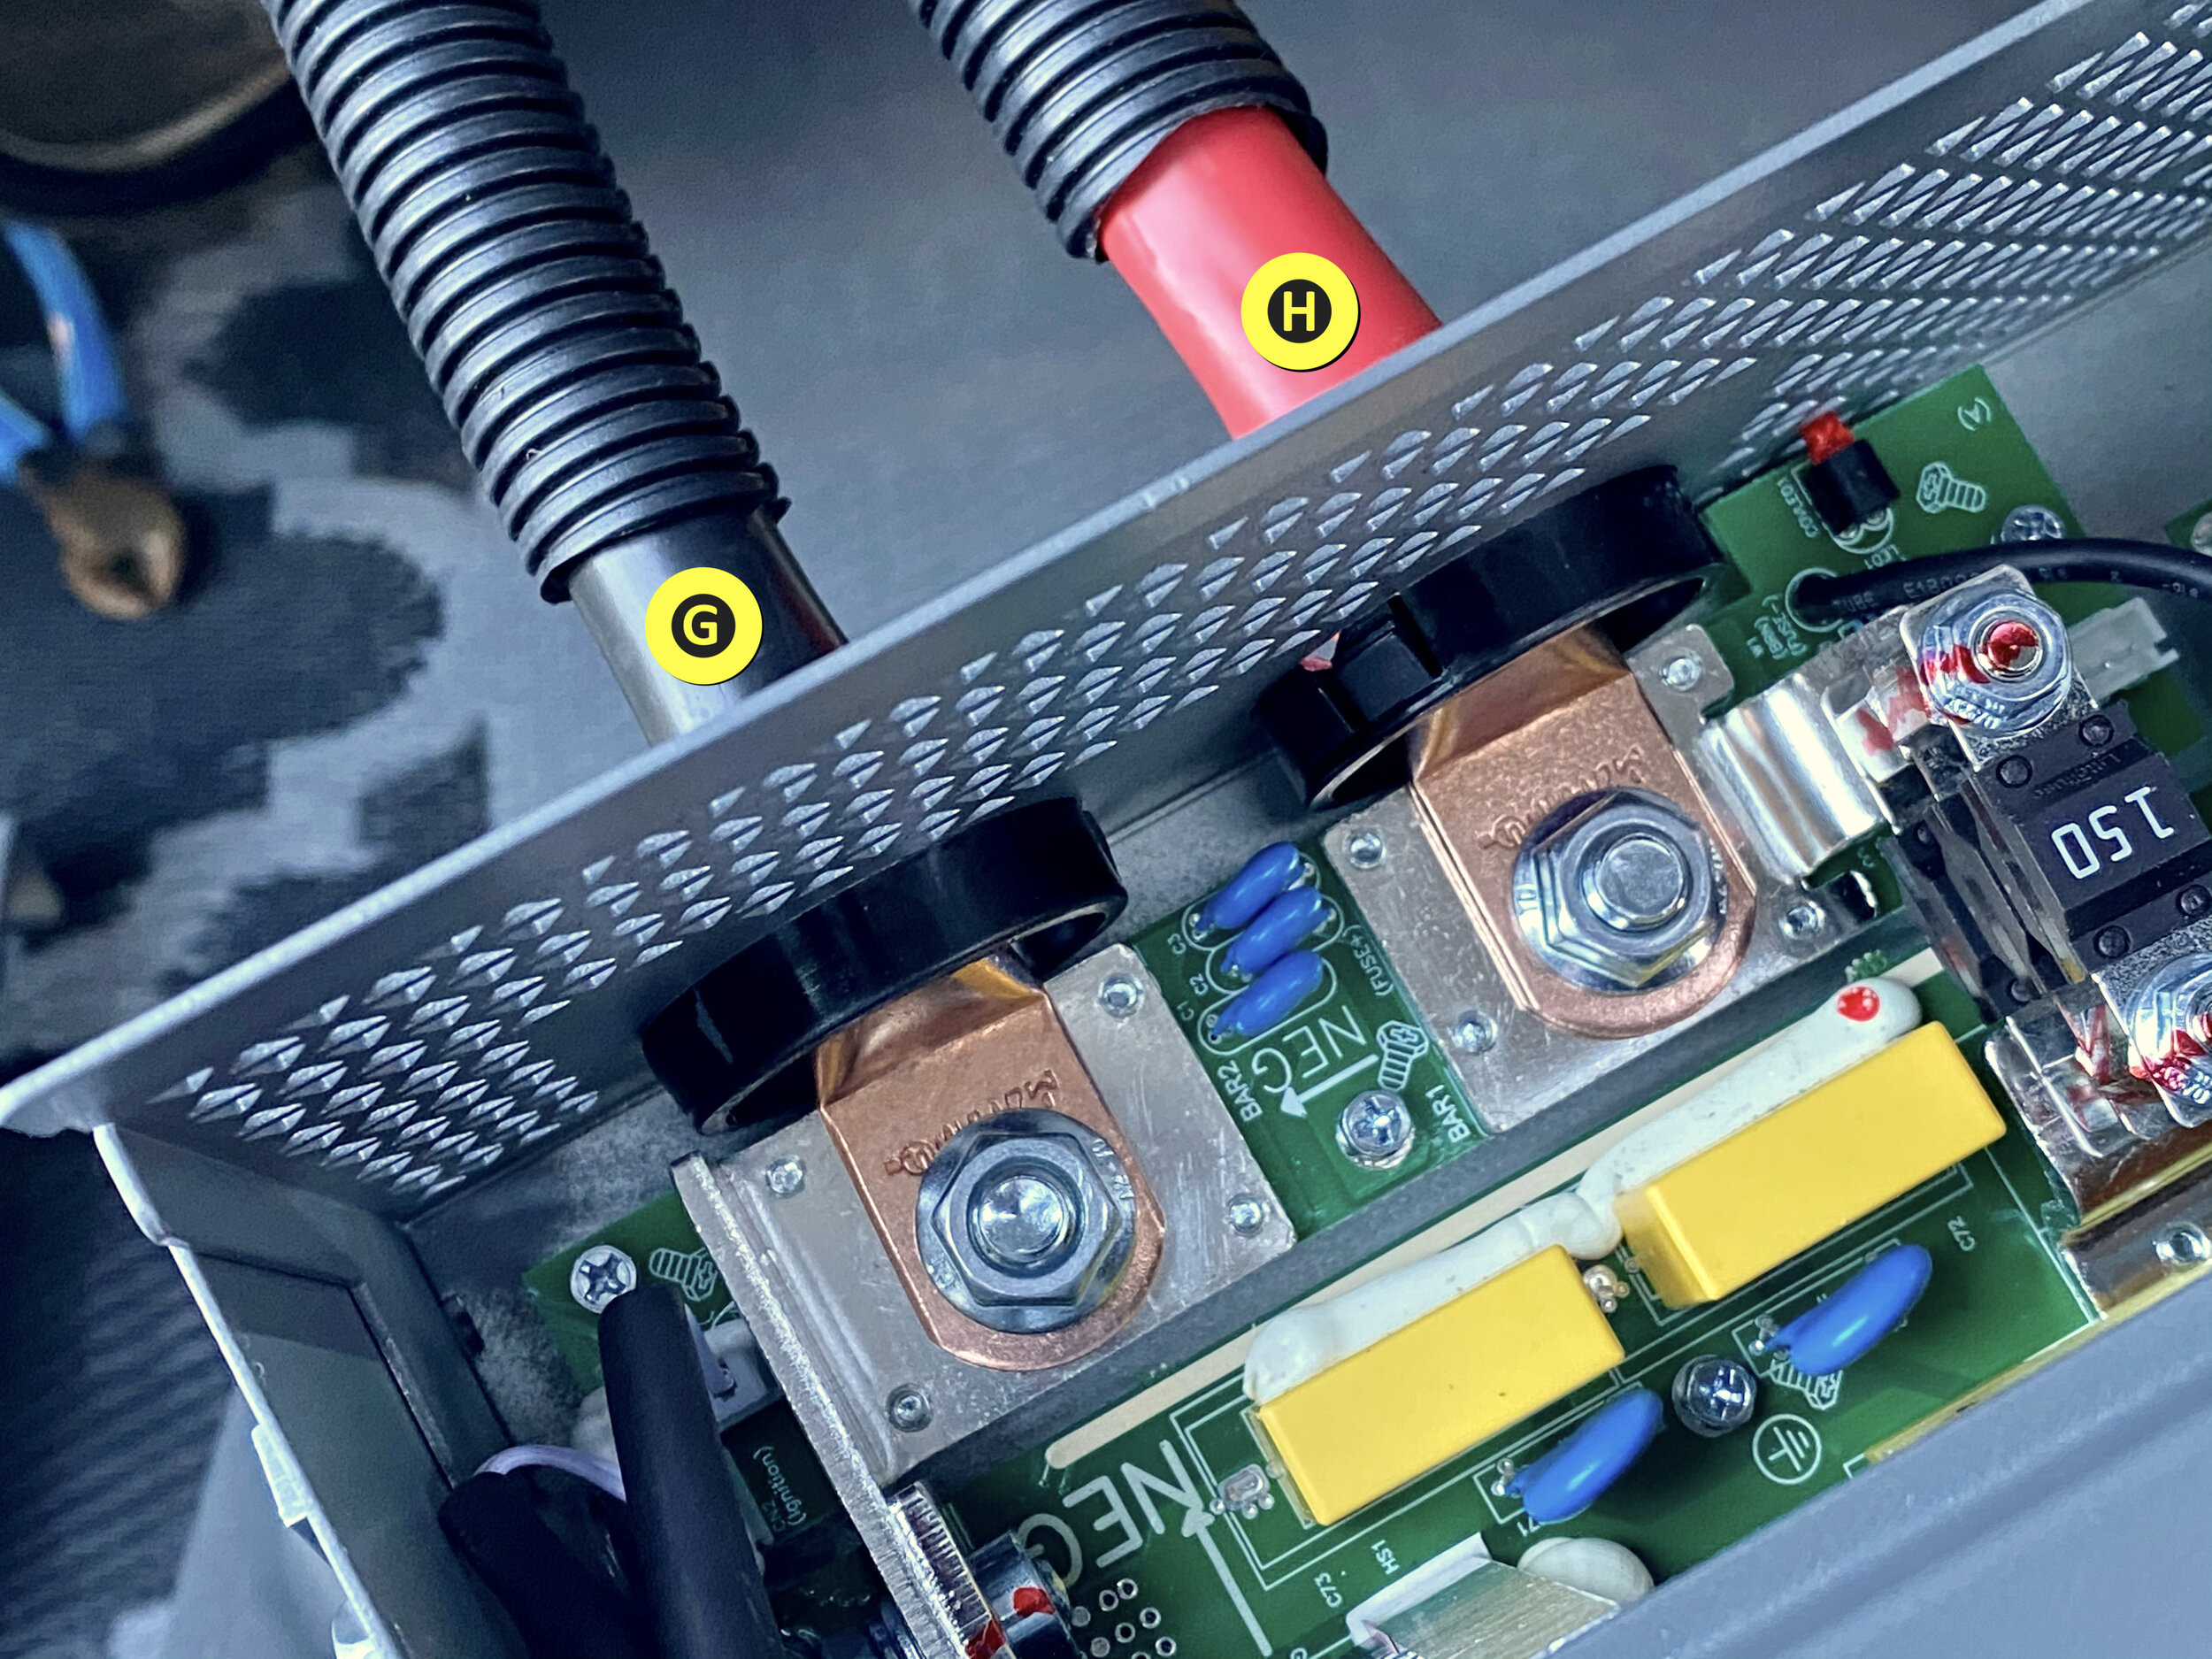
These are the electrical hookups on the rear of the Xantrex Freedom XC Pro Inverter/Charger. “G” and “H” connect to the battery.

These are the electrical hookups on the rear of the Xantrex Freedom XC Pro Inverter/Charger. “I” and “J” connect to the 120vac coach wiring. It’s important to use strain relief clamps (sold separately) to ensure that the wires don’t get pulled loose.

This area is under the corner bed in the J model just behind the distribution panel / circuit breakers.
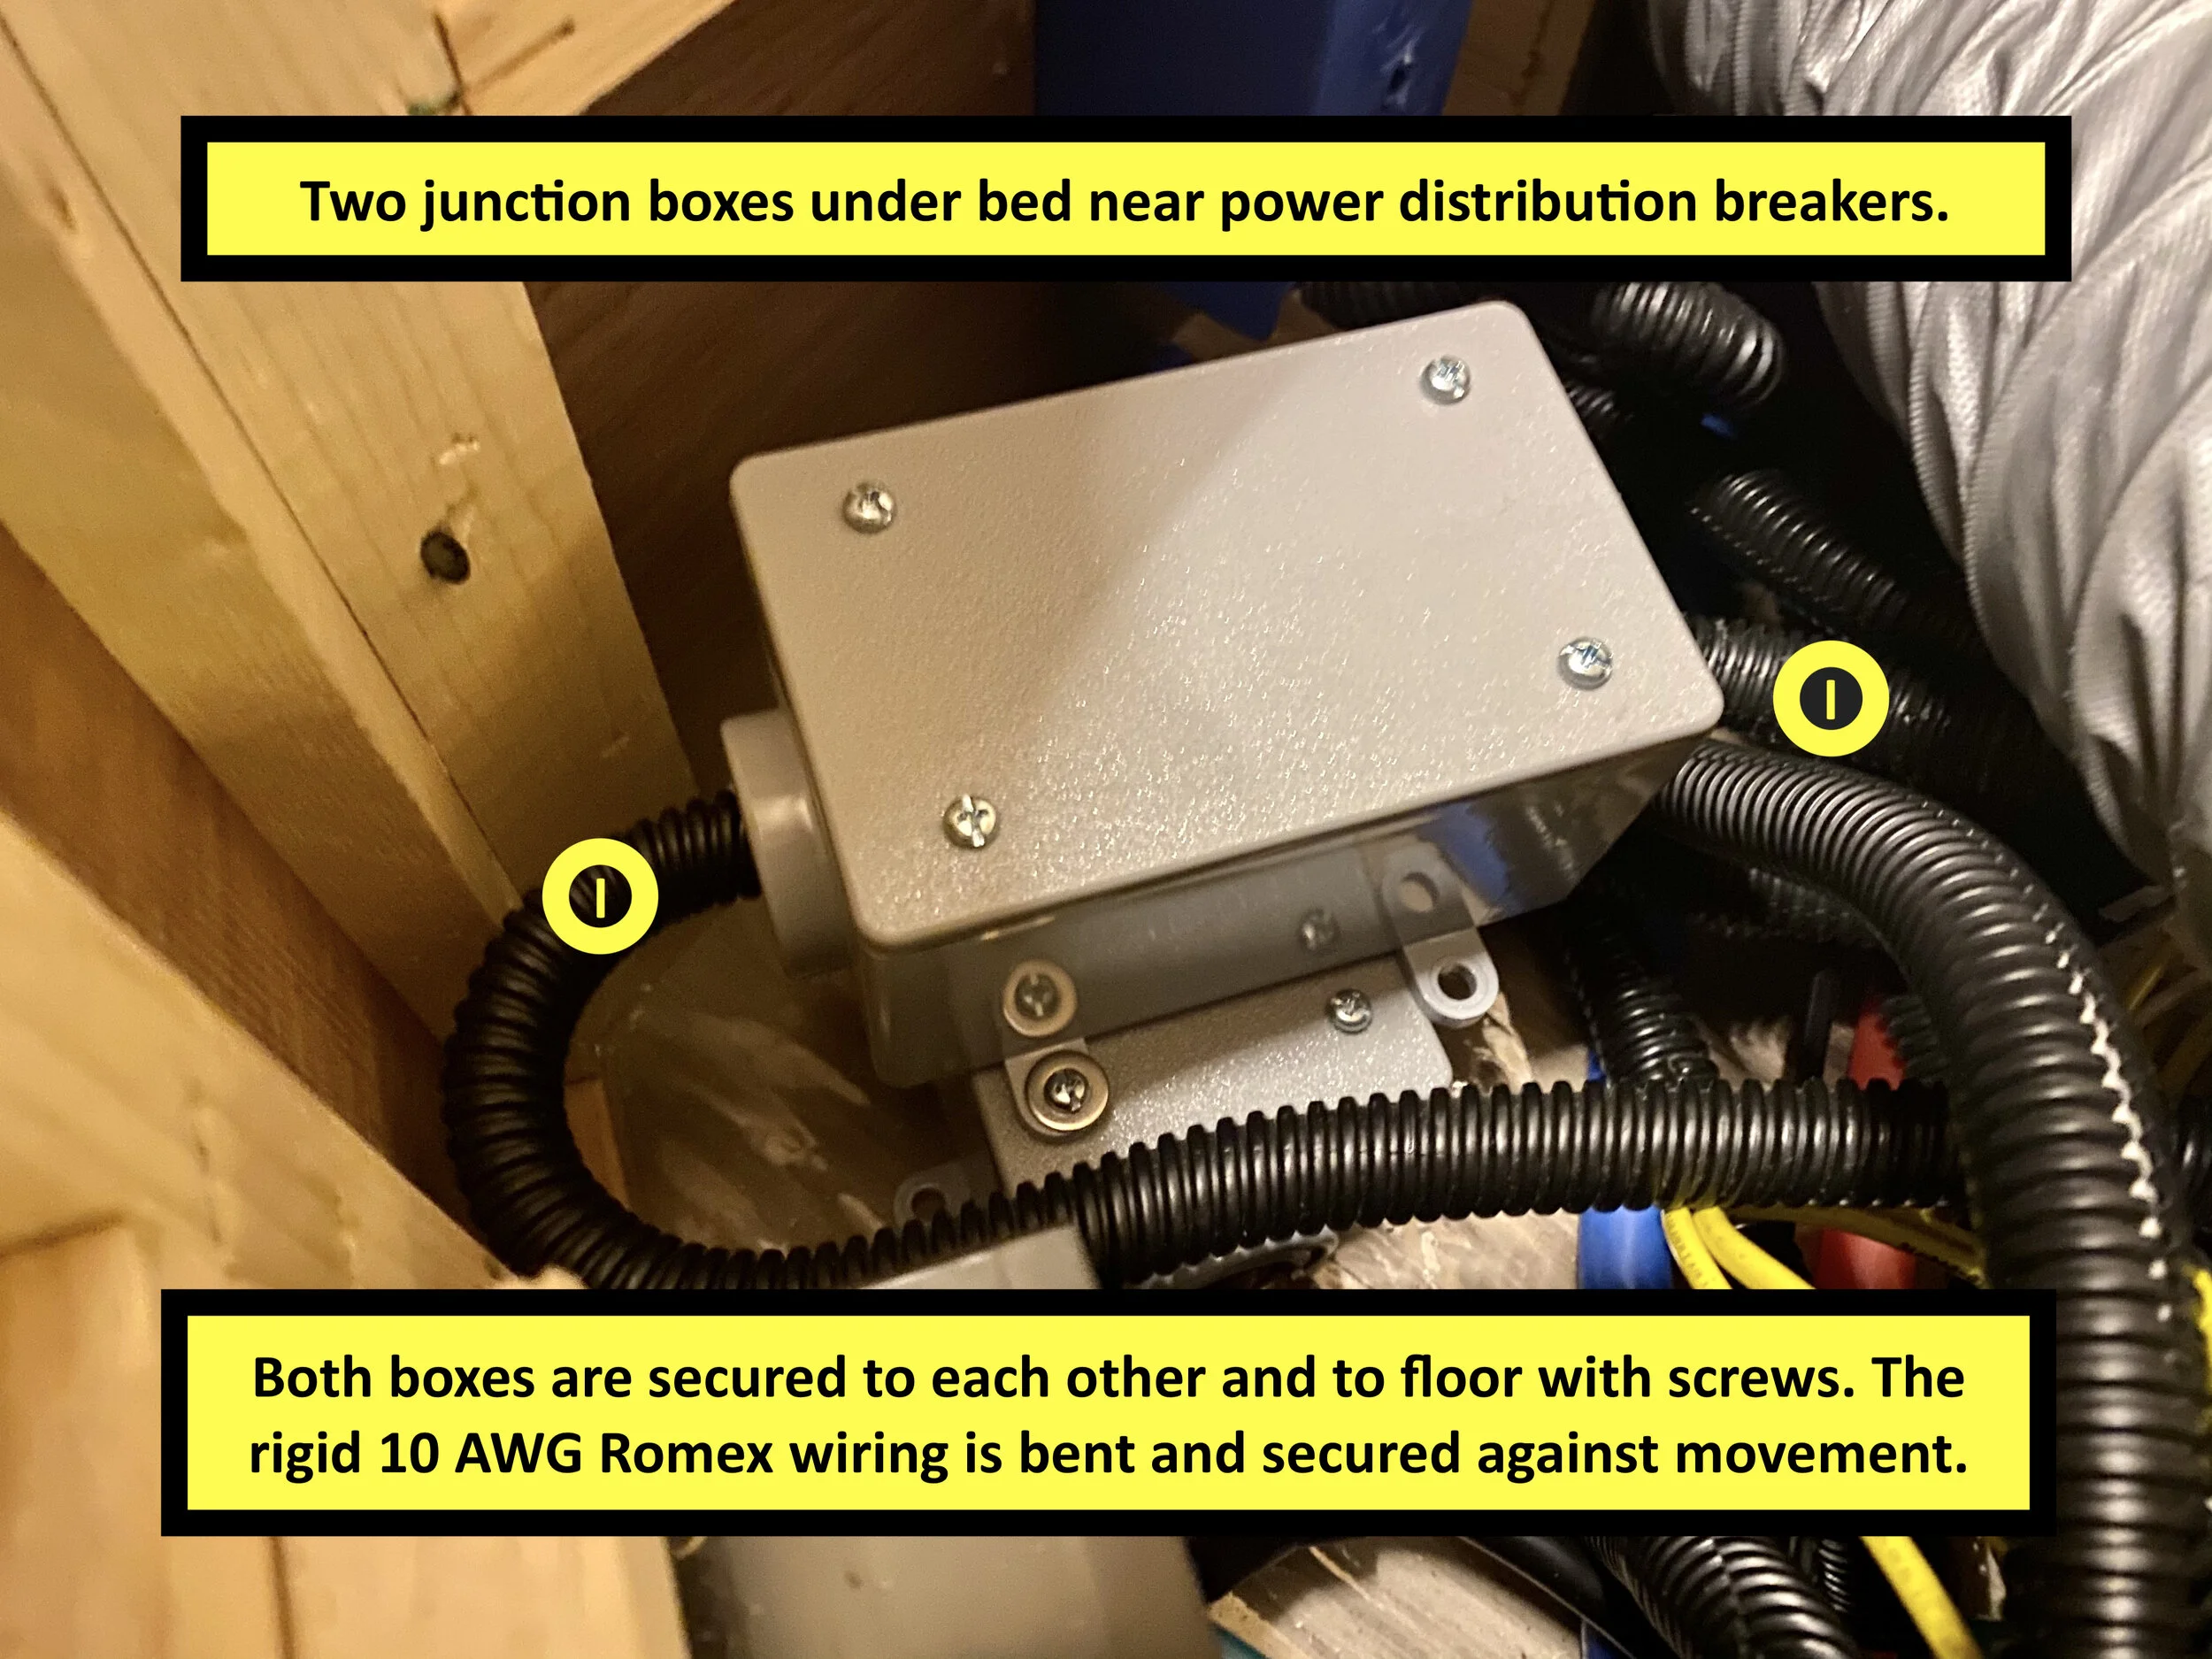
This area is under the corner bed in the J model just behind the distribution panel / circuit breakers.

This is the EMS under the corner bed in the J model just behind the distribution panel / circuit breakers.

This area is under the corner bed in the J model just behind the distribution panel / circuit breakers.

This area is under the corner bed in the J model.

Battery cable, prepped for crimping.

Battery cable crimped, prepped for heat shrink with heat gun. Note: I used too small of a die for this crimp.

Battery cable crimped, prepped for heat shrink with heat gun.
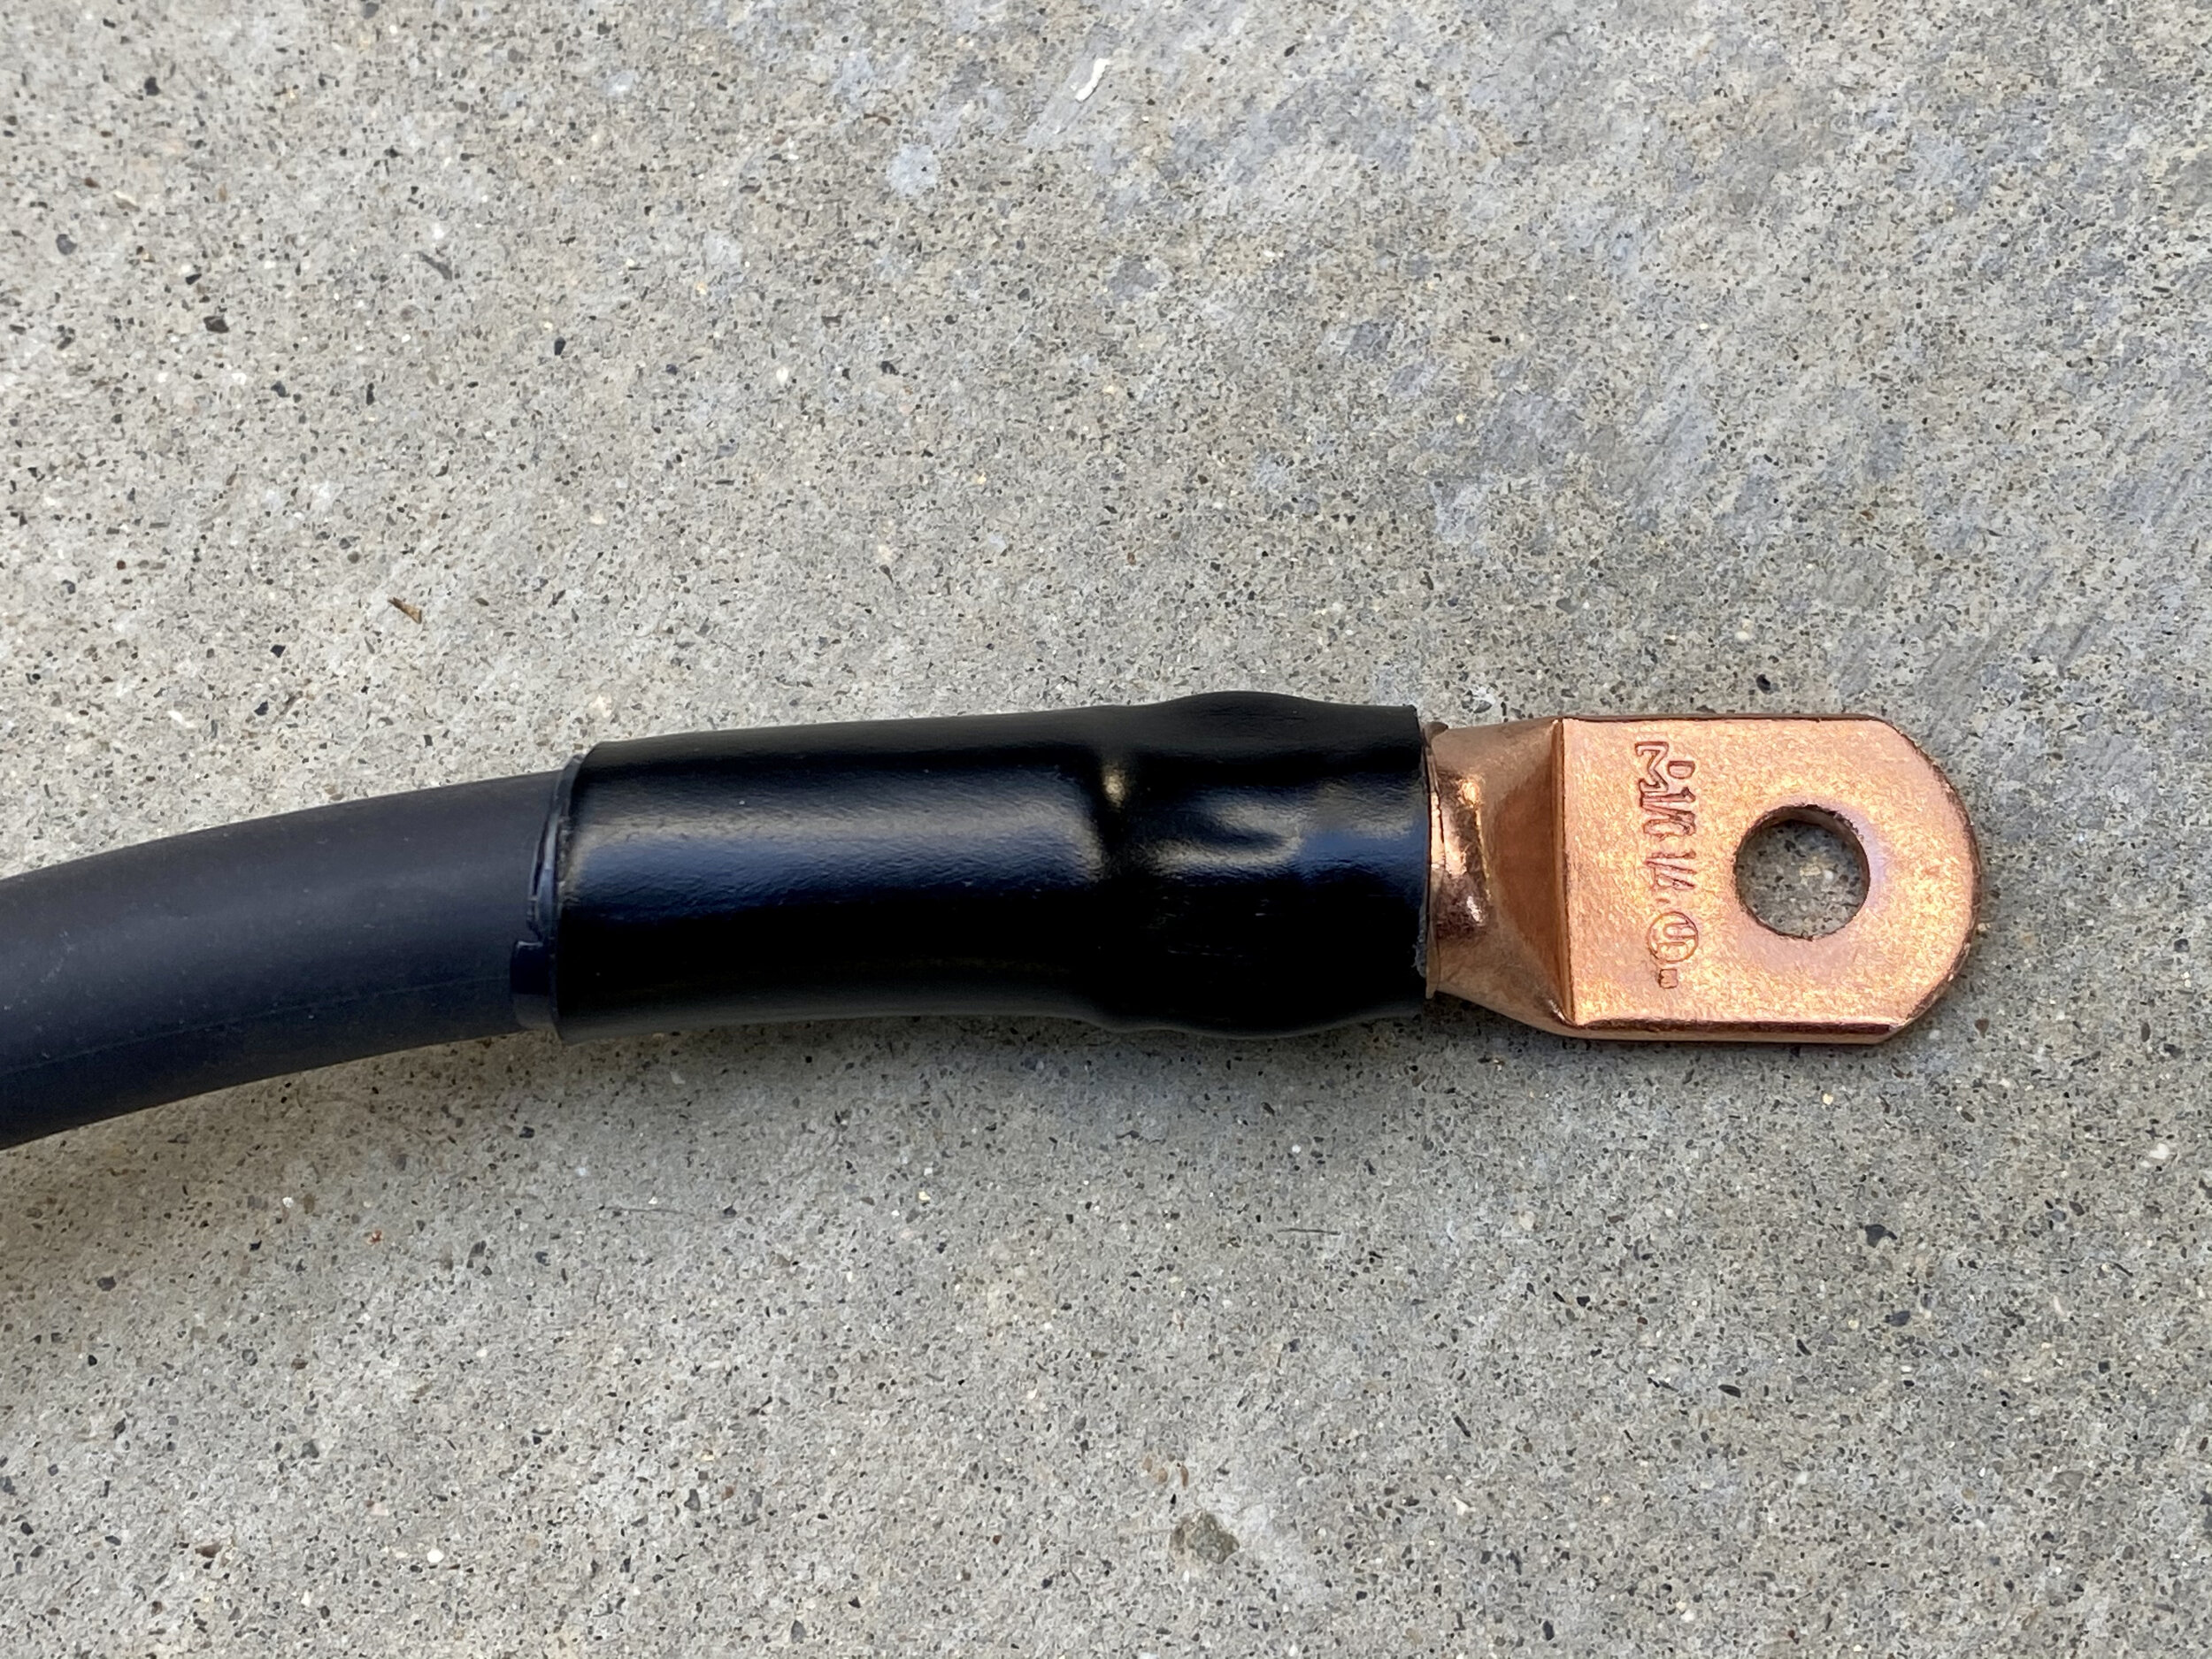
Finished battery cable, crimped with heat shrink.

Xantrex Bluetooth remote panel (mounted above refrigerator, near One Place). I installed this in the same location as the OEM inverter remote panel (which required a larger hole, made with a Dremel tool).


Screenshot of Xantrex "FXC Control" app.

Screenshot of Xantrex "FXC Control" app.

Screenshot of Xantrex "FXC Control" app.