Maintenance: Diesel Generator Oil Change
maintenance / DIESEL GENERATOR OIL CHANGE / details


DETAILS: Diesel Generator Oil Change
My Cummins Onan RV QD 3200 diesel generator did not come with a printed manual, but here is a link to the official digital version:
Cummins Onan RV QD 3200 OPERATOR MANUAL
I changed the generator oil for the second time yesterday on my 18NJ and thought I'd share the step-by-step instructions here to help save fellow V/N owners from an RV dealer over-charging for this simple service.
PLEASE NOTE: this post only applies to the Diesel generator, not the LP / Propane generator.
Oil Change Intervals:
According to the Cummins Onan manual (linked above), the first oil change should occur at 20 hours or after 1 year, which ever comes first (according to the latest version of the OPERATOR MANUAL published in 2018). The second oil change is due at a total time of 250 hours (which is where I'm at now). If you operate in dusty conditions, it is advised that you perform the oil change more often. If neither criteria are met within a year, it is recommended to at least change your oil on an annual basis.
Exercise the Generator (excerpt from manual):
Exercise the generator set at least 2 hours each month if use is infrequent. Run the generator set at approximately 1/2 rated power. A single 2-hour exercise period is better than several shorter periods.
Exercising a generator set drives off moisture, re-lubricates the engine, replaces stale fuel in fuel lines, and removes oxides from electrical contacts and generator slip rings. The result is better starting, longer engine life, and greater reliability.
Oil Change Location:
I changed the oil in a parking lot near a Jiffy Lube. I asked ahead of time if they would be willing to dispose of my used oil and allow me to use their compressed air to clean out the oil strainer, and they were very accommodating! I did the same thing the first time I changed my oil when I was on the road.
Step-by-Step Instructions:
Park on level ground.
Run the generator on a load for a few minutes to get the engine oil warm, and then shut down.
Place an oil pan below the generator (I bought a cheap plastic one at O'Reilly for $3).
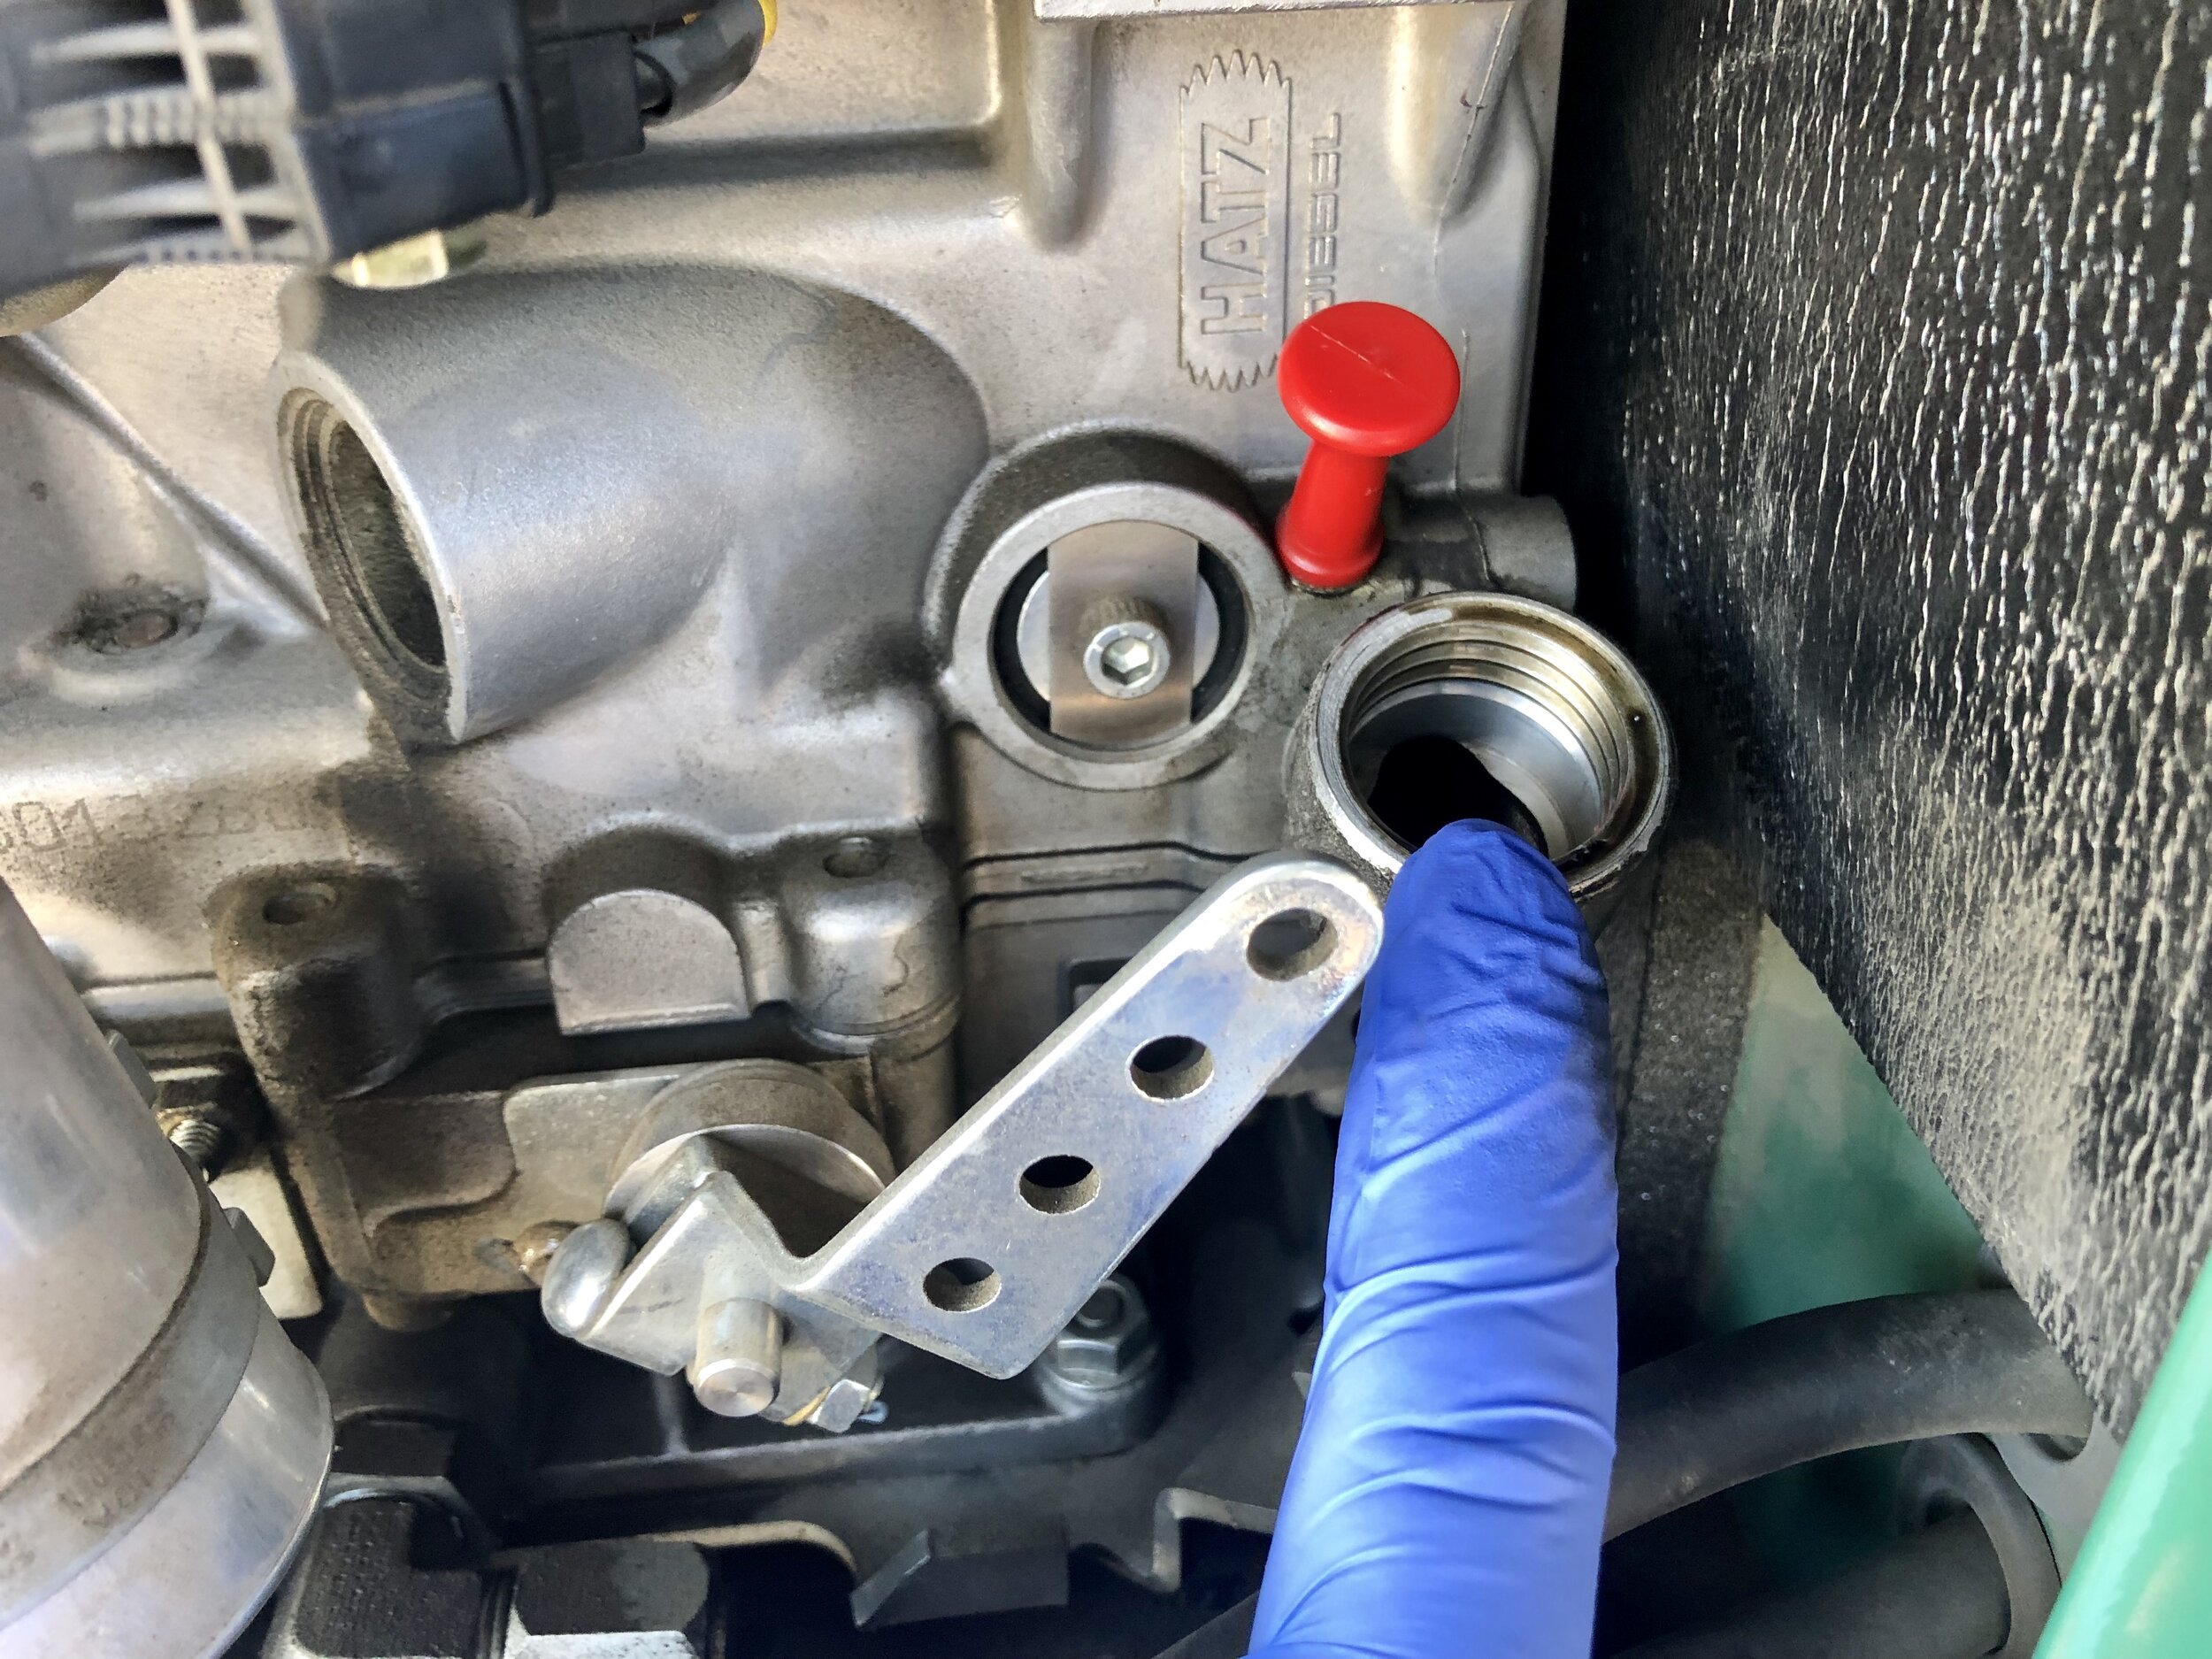
Remove the front access door and oil fill cap.
Unscrew the oil drain plug with a 22 mm combination wrench (link below). Try not to let the plug (nut) fall into the hole. If it does, it will block the hole and make a mess inside the generator compartment. I learned this lessen twice, so I'm passing it along! I hope I re-read this before my 3rd oil change. Allow all of the oil to drain from the engine (this could take 30+ minutes).
Reinstall the oil drain plug.
Refill with approved oil (link below). Although the total capacity is 1.1 liters (1.16 quarts), since there is residual oil in the engine during an oil change, it is recommended to add .7 quarts and then check the level with the dipstick and add (or drain) as necessary. Do not over-fill or under-fill.
Screw the oil fill cap on securely.
Dispose of used oil (this is easy if you do this in a parking lot near a Jiffy Lube or similar establishment).
Loosen the center screw of the oil strainer with a 5 mm Allen wrench. It will take about 5 turns (don't unscrew all the way as it becomes a pull handle). Withdraw the strainer from the engine block.
Use compressed air to clean the strainer. Blow the debris from inside out.
Replace the O-rings or strainer if damaged.
Lubricate the O-rings with clean oil and insert the strainer until it stops.
Check for spring tension against the strainer and tighten the center screw.
Inspect the air filter. Unscrew the knurled nut to remove and visually inspect the air filter element. If dirty or damaged, replace (see manual for more details).
Secure the front access door.
Run generator on a load for a few minutes, then shut down, remove front access door and check for leaks.
Fuel Filter & Air Filter Replacement
It is recommended that both the fuel filter and air filter be replaced annually (see small notations on the Periodic Maintenance Schedule). The two filters linked below are the correct part numbers (verified with Cummins and cross-referenced in the Parts Manual despite the Cummins website failing to notate Spec “D” compatible).
For the Fuel Filter, be sure to have paper towels or rags ready to clean the two fuel hose fittings and absorb any fuel that spills. Clean the two fuel hose fittings to keep dirt from entering the fuel hoses. Loosen the two fuel hose clamps and the filter body clamp and replace the filter element. Make sure the arrow on the filter element points UP in the direction of fuel flow. Dispose of the fuel filter and paper towels or rags in accordance with local environmental regulations.
For the Air Filter, first remove the filter cover. Then unscrew the the knurled nut and remove the old filter element. Clean dust and debris from the filter housing and install the new filter element. Finally, secure the front access door.
Cleaning the Spark Arrestor
I couldn’t locate a spark arrestor on my generator exhaust, and according to Winnebago, my 2018 doesn’t have an in-line spark arrestor on the tailpipe. However, if you do, the cleaning procedure is as follows:
Fist, remove the clean-out plug on the bottom of the muffler. Next, start the generator and load it nearly to full power. Let the generator set run for about five minutes to expel the soot. Stop the generator, allow the muffler to cool down, and reinstall the clean-out plug. That’s it!
OIL/FILTERS/TOOLS:
Approved Diesel Generator Oil: www.amazon.com/dp/B000GAP43W
Cummins Onan Generator Fuel Filter (149-2834): www.amazon.com/dp/B005GDJSXQ
Cummins Onan Generator Air Filter (140-4151): https://bit.ly/2RFrbln
22 mm Combination Wrench: www.amazon.com/dp/B00Q01ONTW
OFFICIAL MANUALS:
Operator Manual (9/2018): https://bit.ly/2wFaYFv
Service Manual (12/2018): https://bit.ly/2wZfzm3
Parts Manual (4/2019): https://bit.ly/3epZneF
Spares List (6/2017): https://bit.ly/2wKEfi2